Launch offer — valid today only

📄 Digital book in PDF · read it on your phone or print it

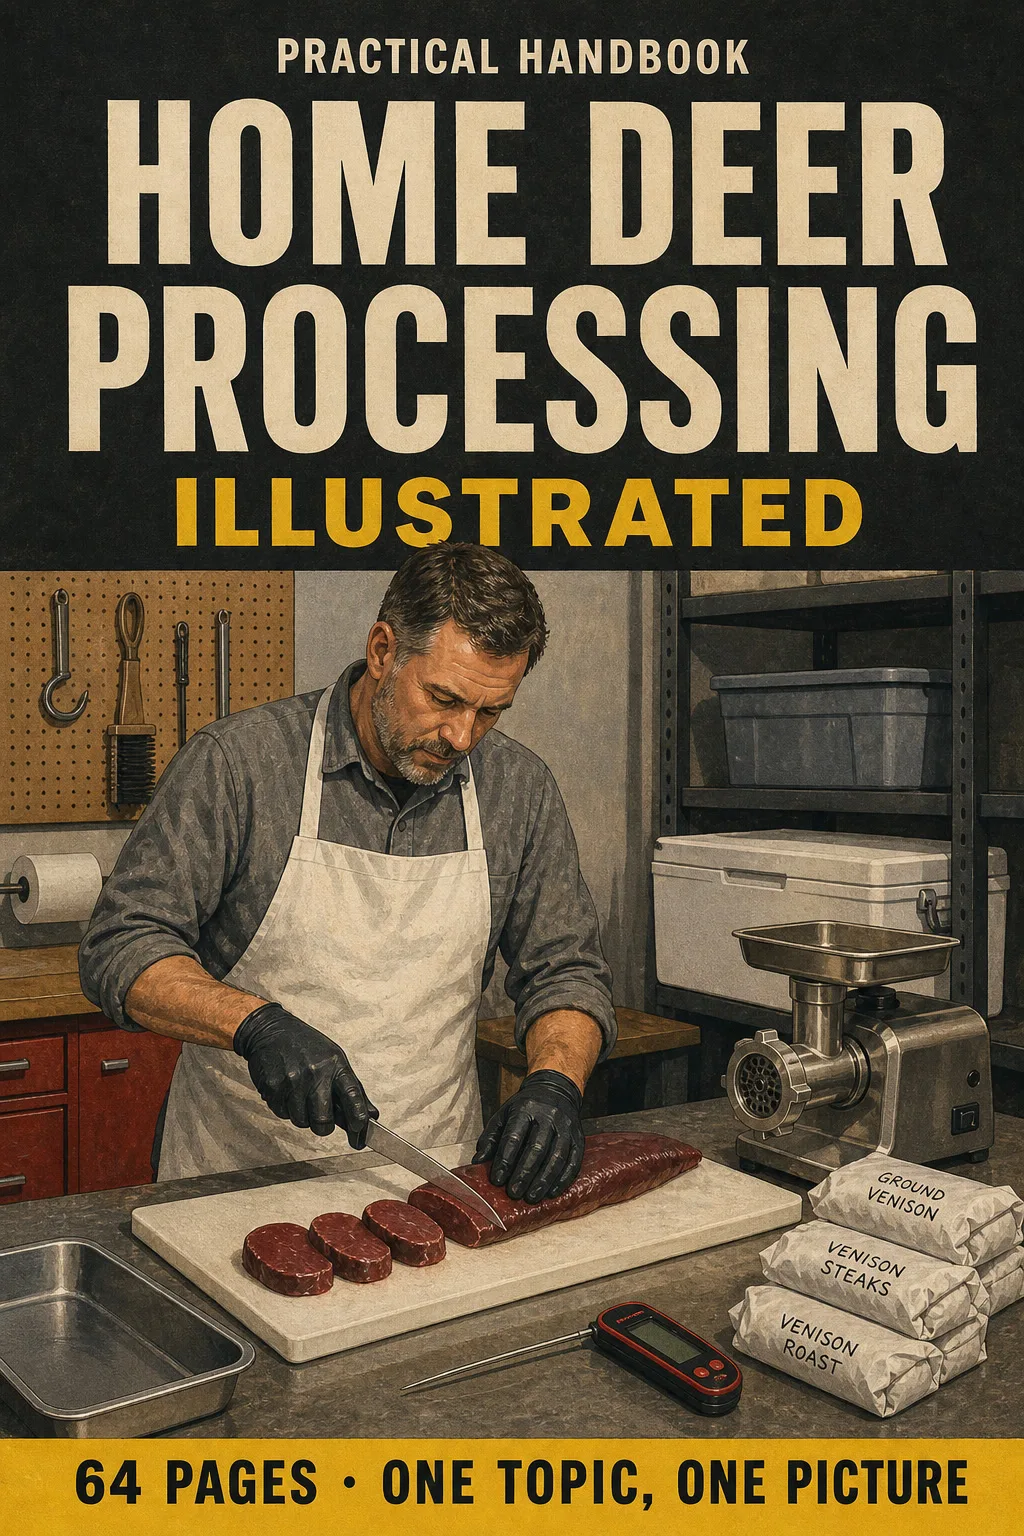
Home Deer Processing, From Hanging to Freezer, in Drawings Every Cut on Its Own Page

Cooling the carcass, skinning in order, the deer muscle map, primal cuts, the hindquarter seam by seam, cleaning silverskin, grinding, double wrapping and the freezer at 0°F. Every topic has its page: first the drawing, then what you need to remember. 64 illustrated pages.

PROCESS YOUR DEER THIS WAY

🔒 Secure checkout · PDF by email · 30-day guarantee

Every topic, its own pageEvery cut and muscle seam drawn, with the explanation right beside it
64 illustrated pages8 parts, from the order of work to cleanup and carcass disposal
Up-to-date sourcesTemperatures checked against USDA FSIS safe-handling guidelines · CWD and disposal: the book tells you to check your state's rules
PDF by emailFormat

Look Inside the Book

Every page has one big drawing and a box with the steps and temperatures you need to know:

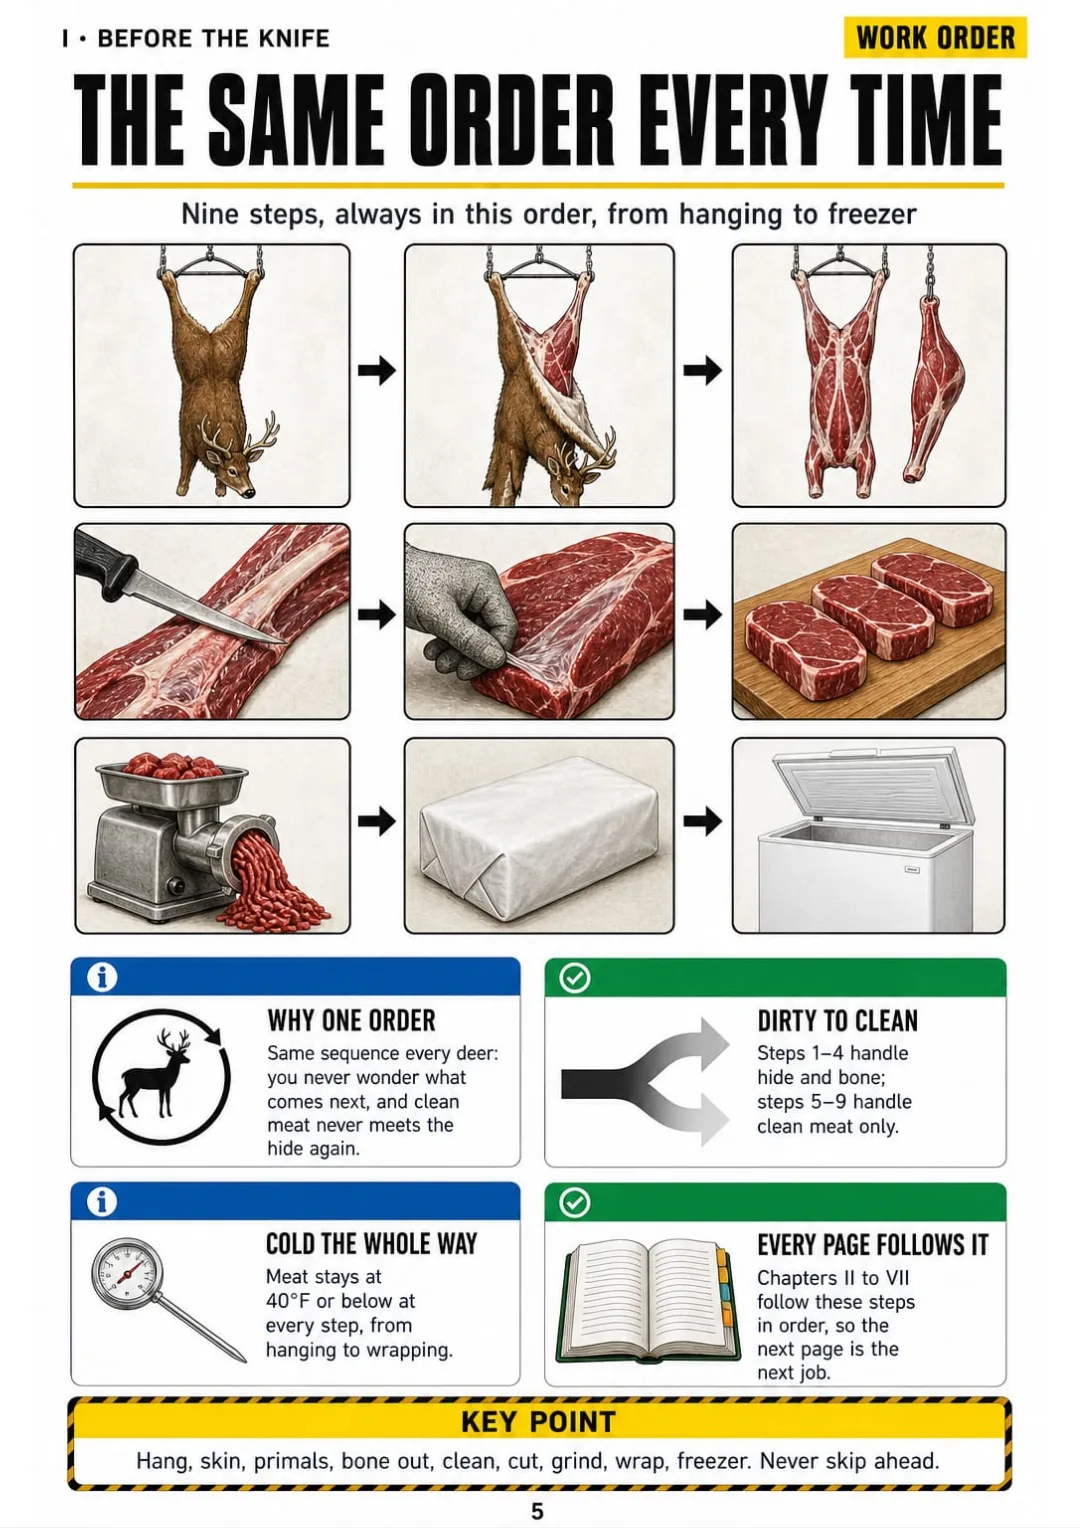
9 steps in one drawing: hang → skin → primals → bone out → clean → cut → grind → wrap → freezer
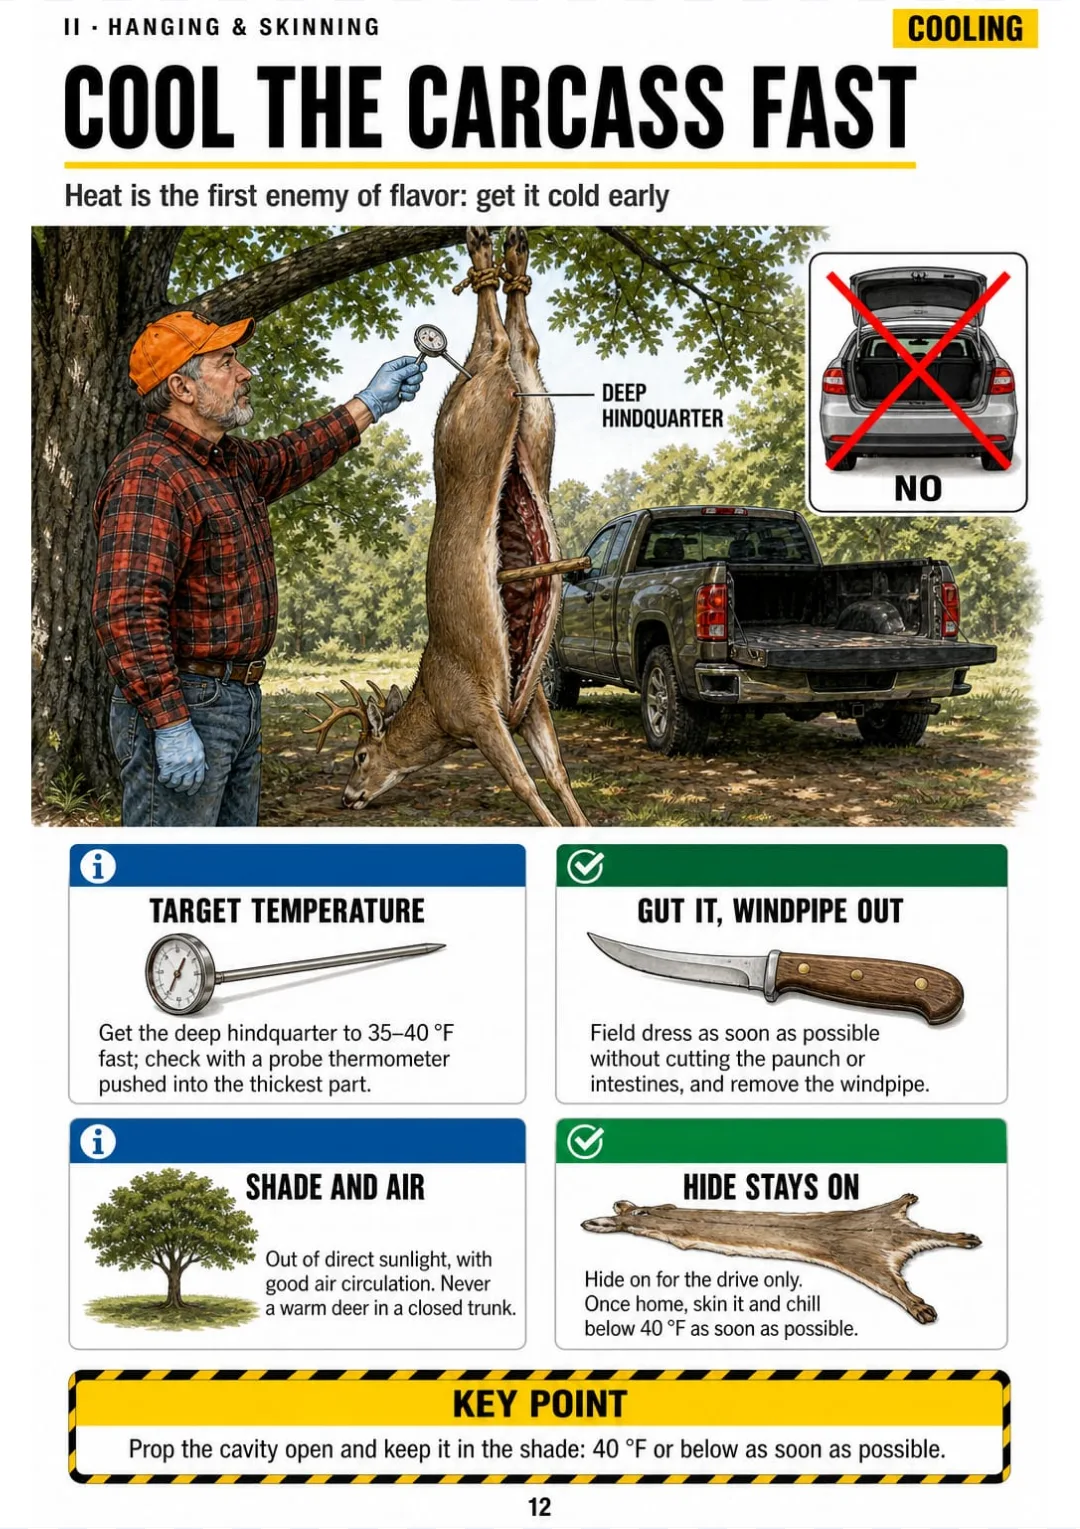
Cool the carcass to 35–40 °F fast, in the shade, with the cavity open
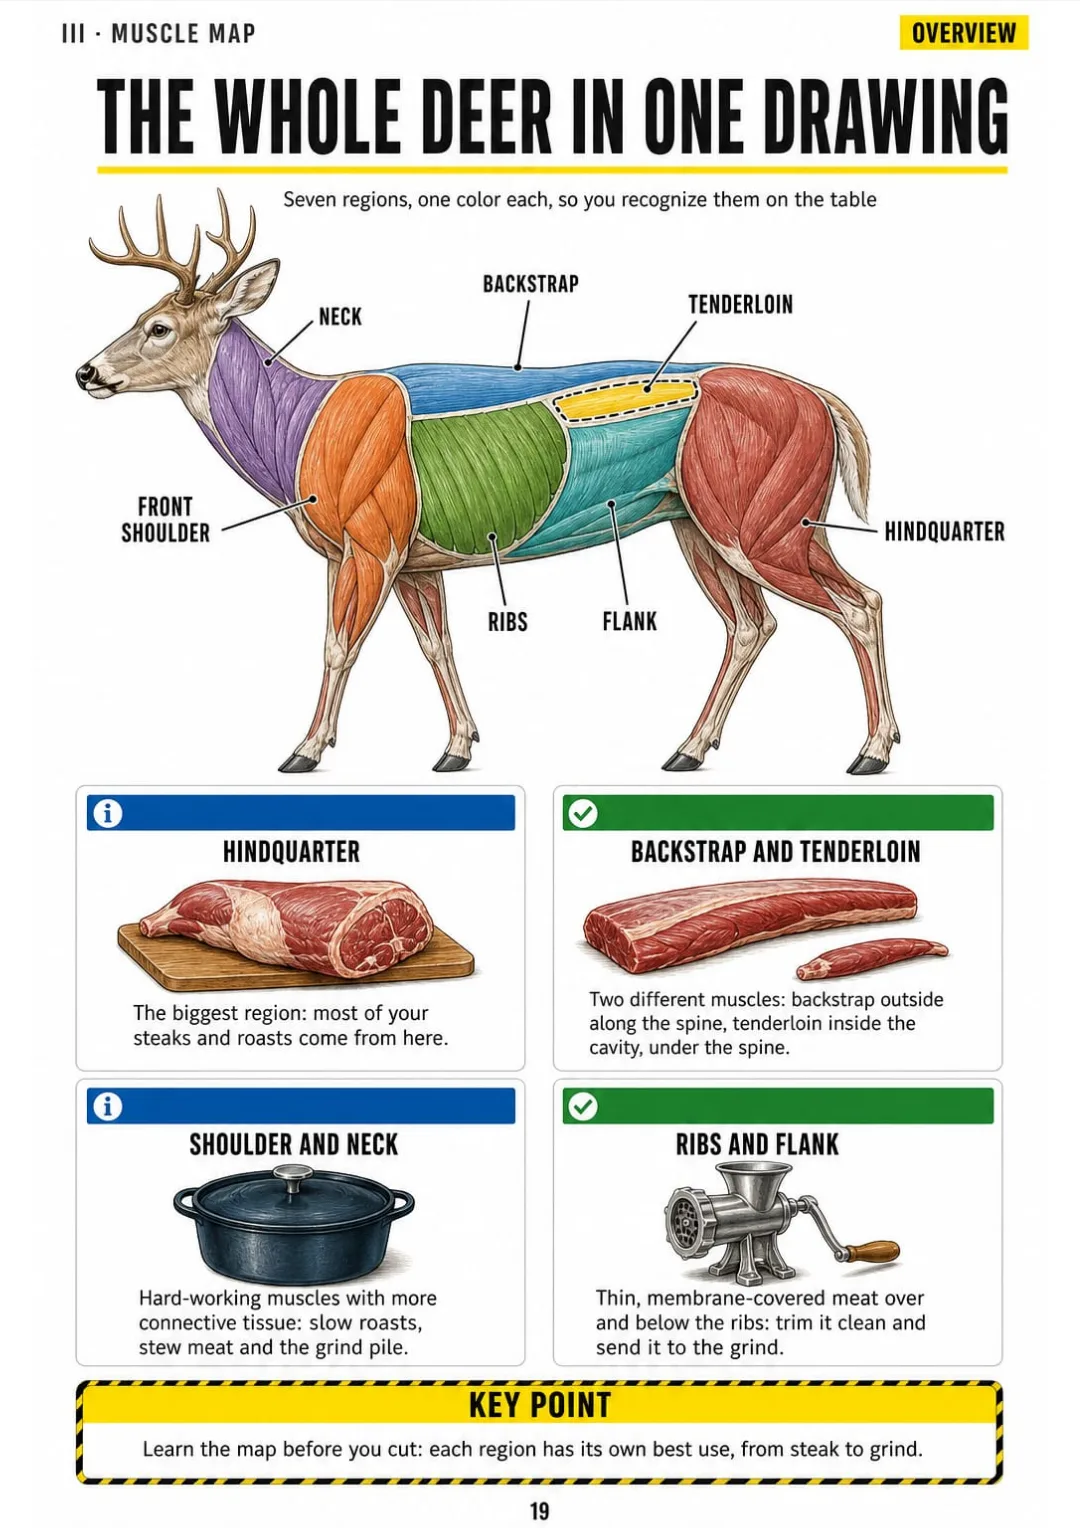
Seven regions of the deer, one color each: neck, shoulder, backstrap, tenderloin, ribs, flank, hindquarter.
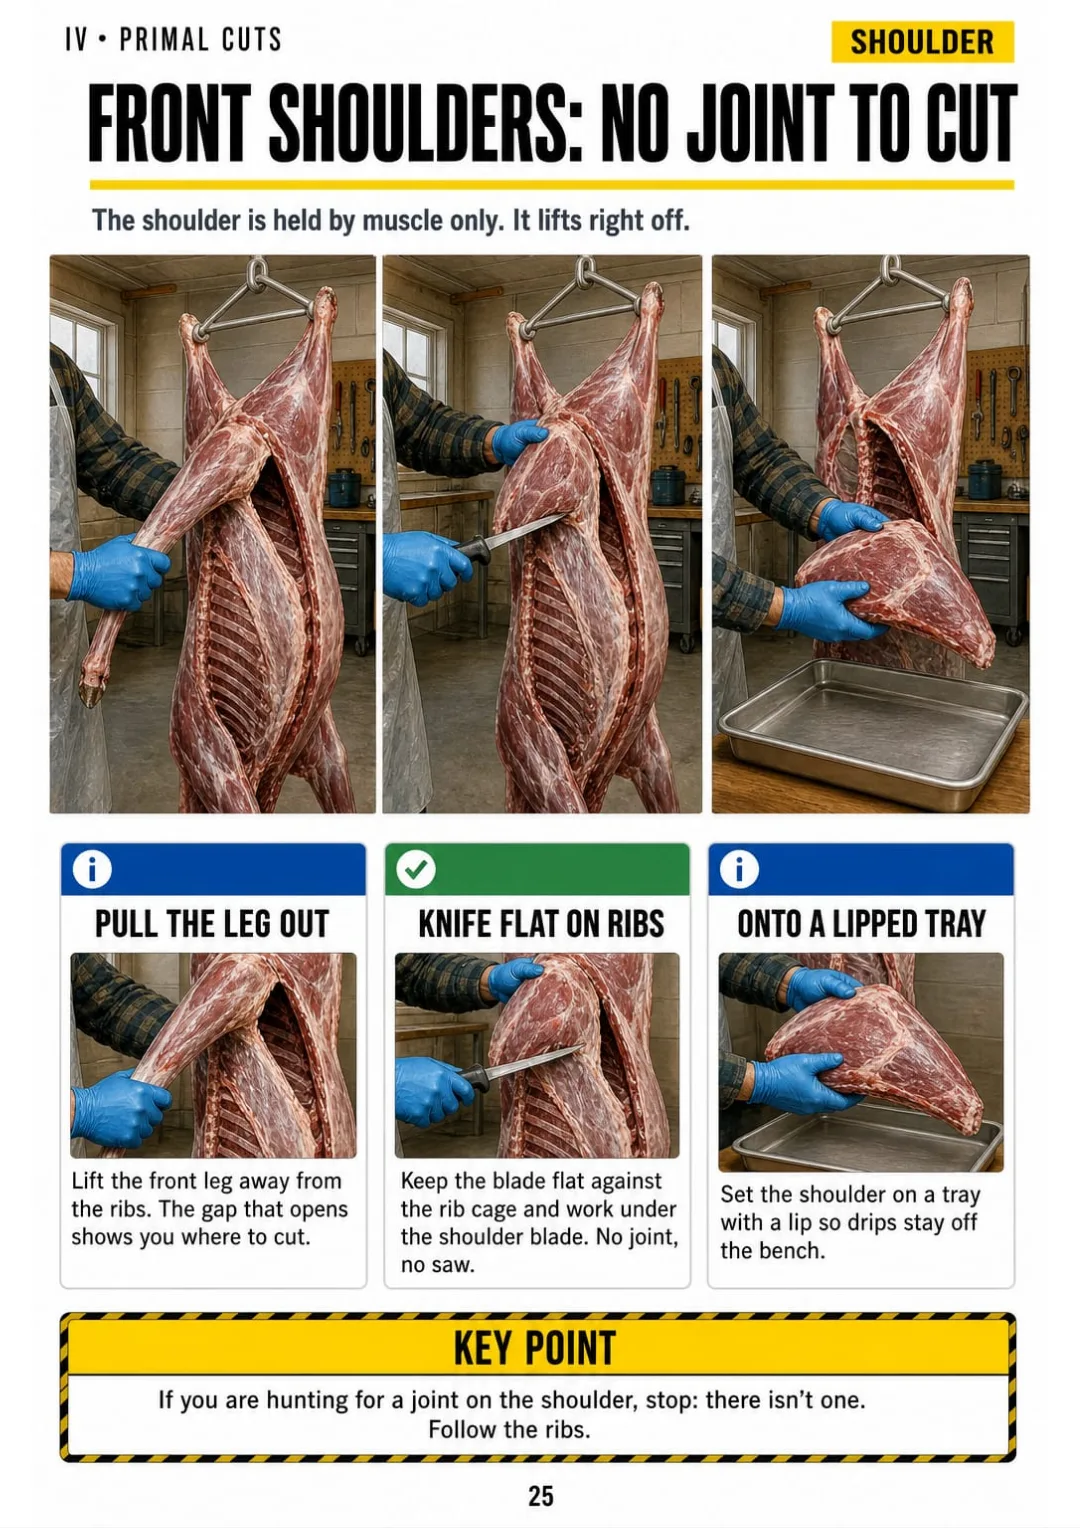
Front shoulder off in 3 steps: pull the leg, slide flat along the ribs, lift free.
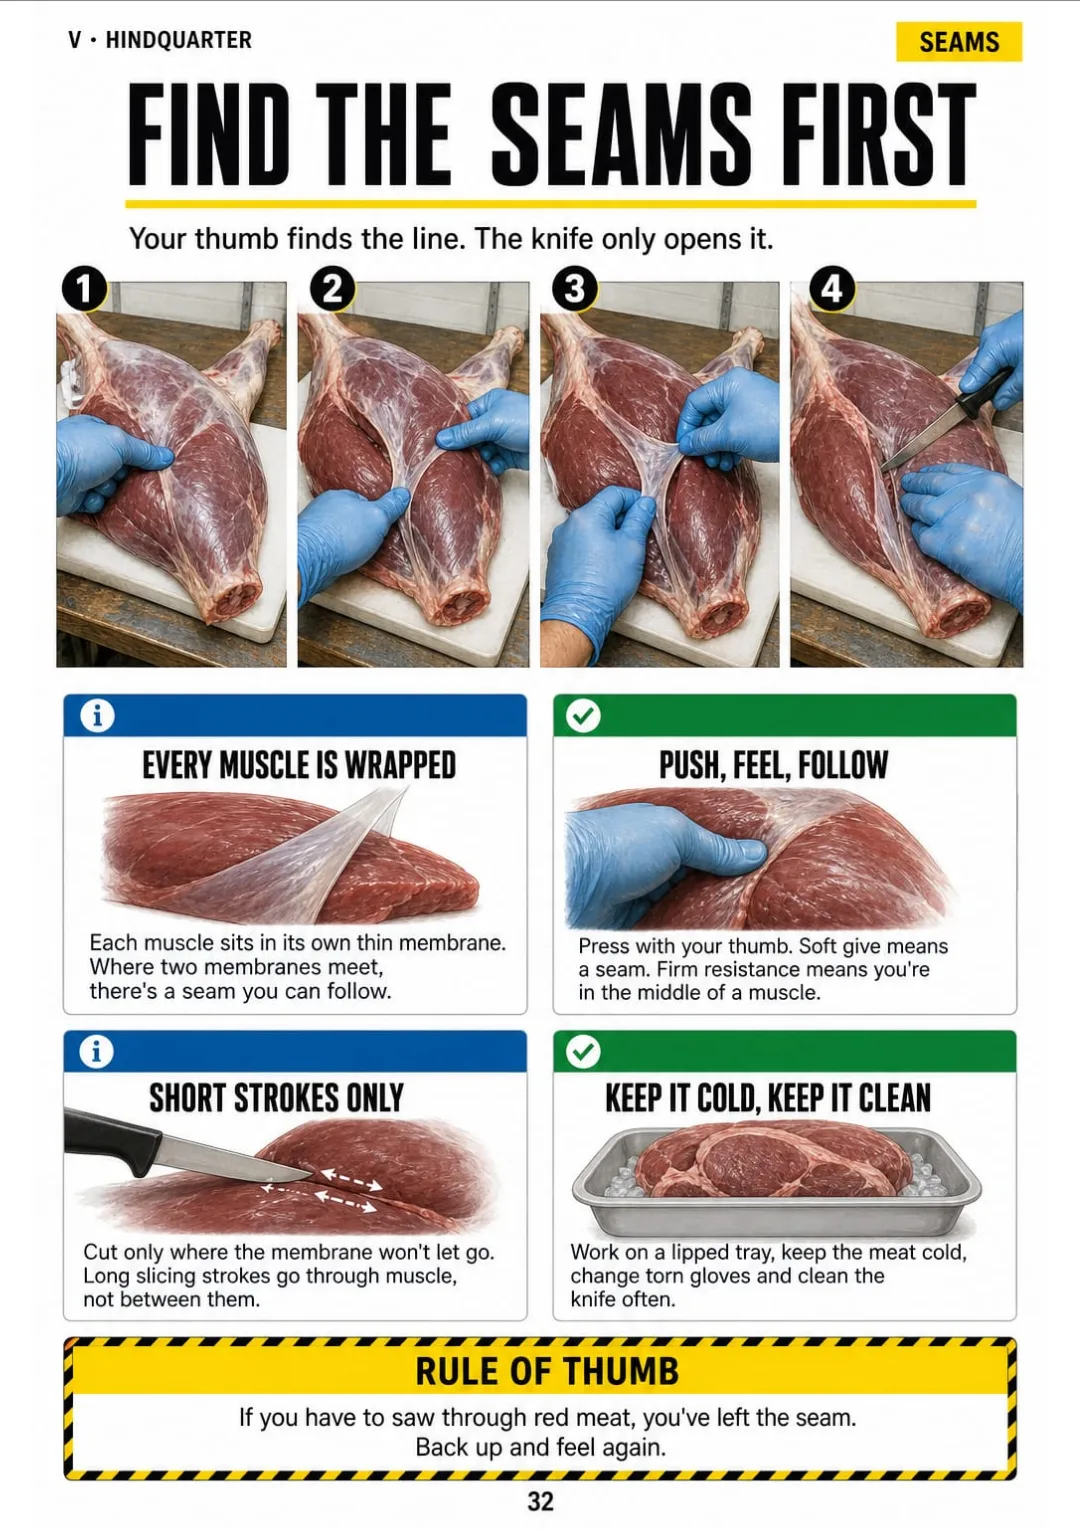
Push with your thumb, follow the membrane, cut only where it holds.
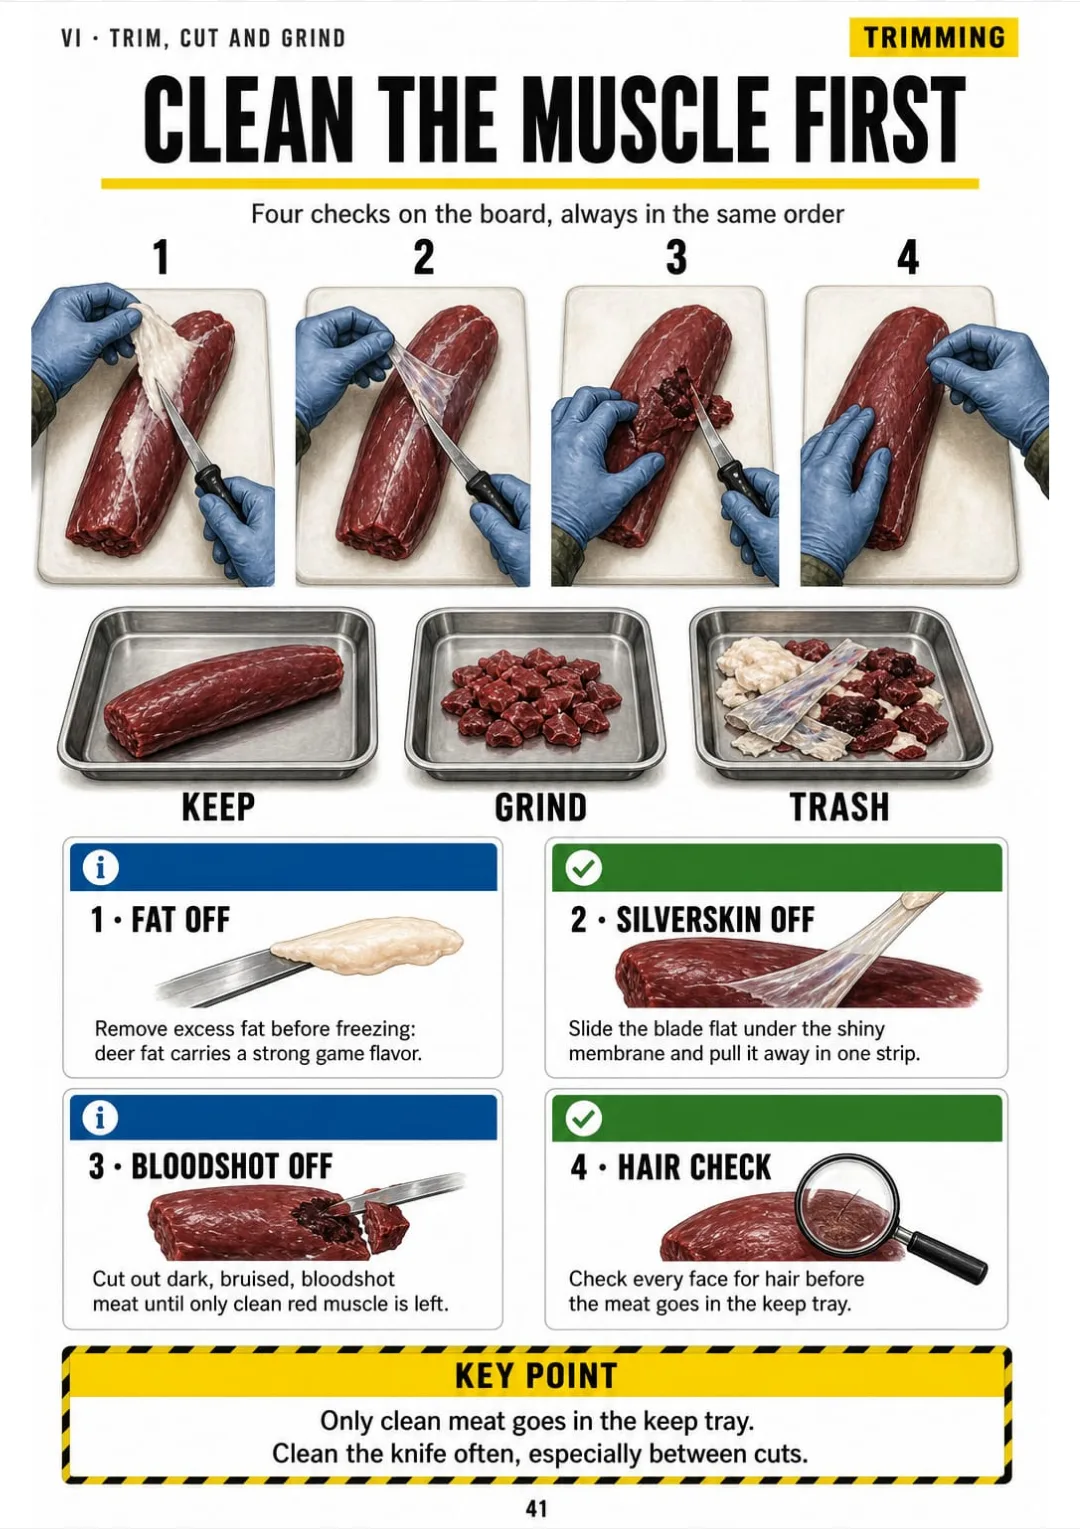
Fat off, silverskin off, bloodshot off, hair checked: then the meat goes in the keep tray.
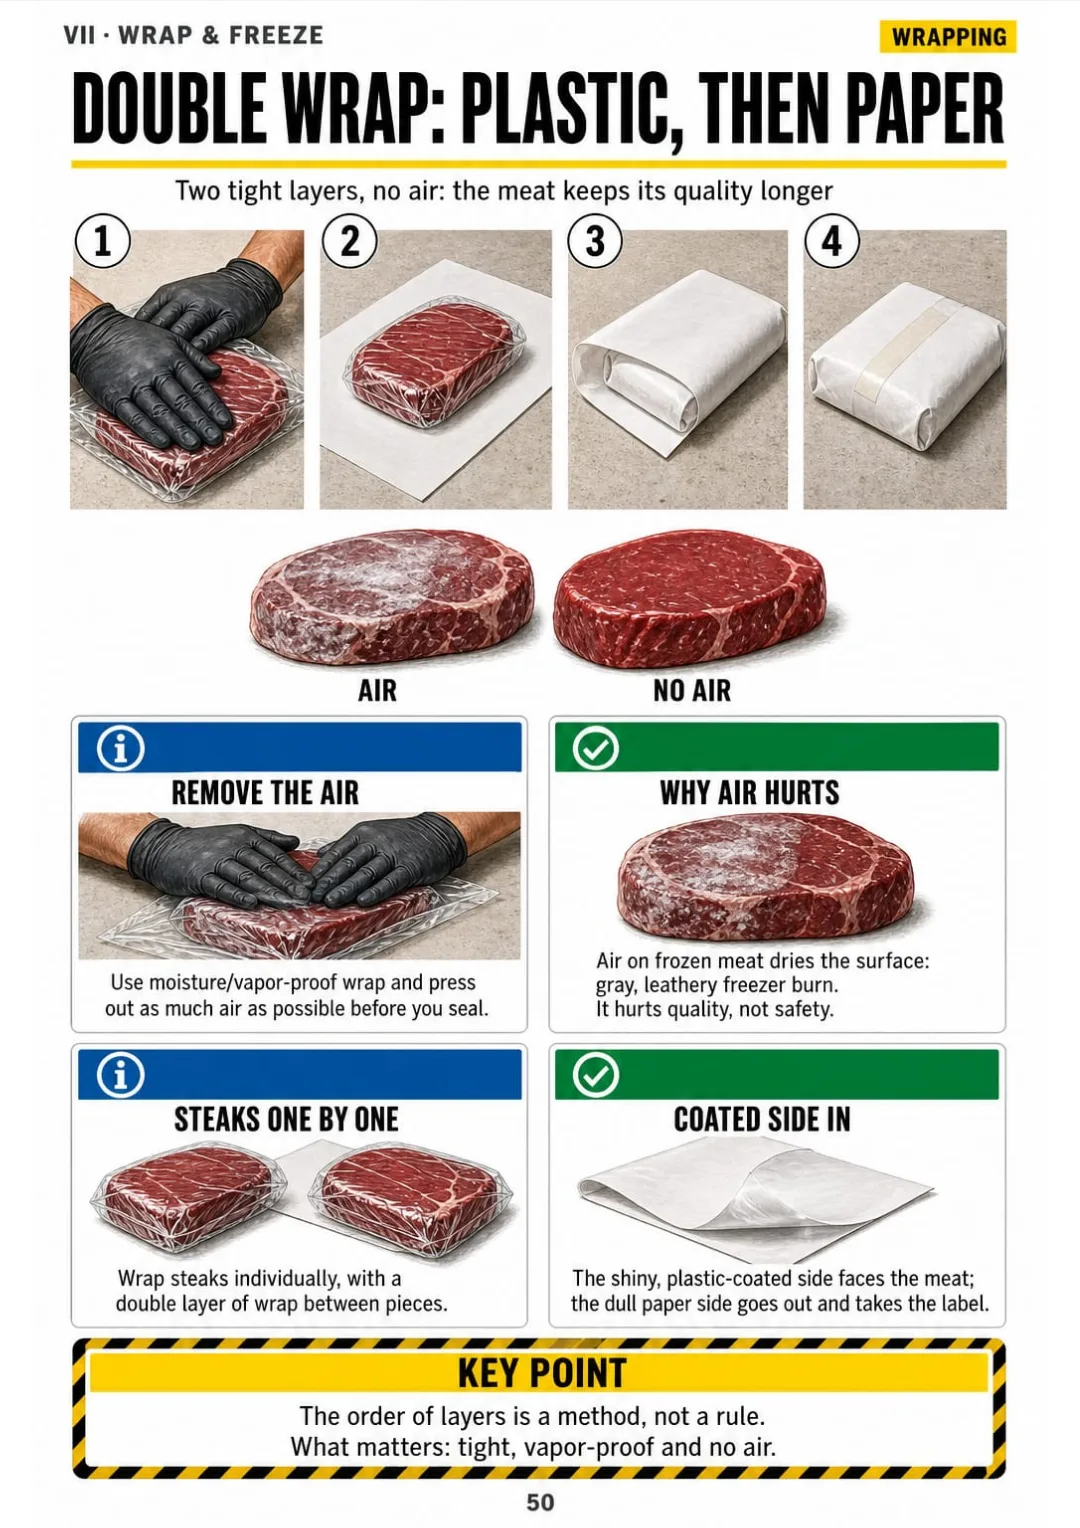
Two layers, air pressed out, steaks wrapped one by one.
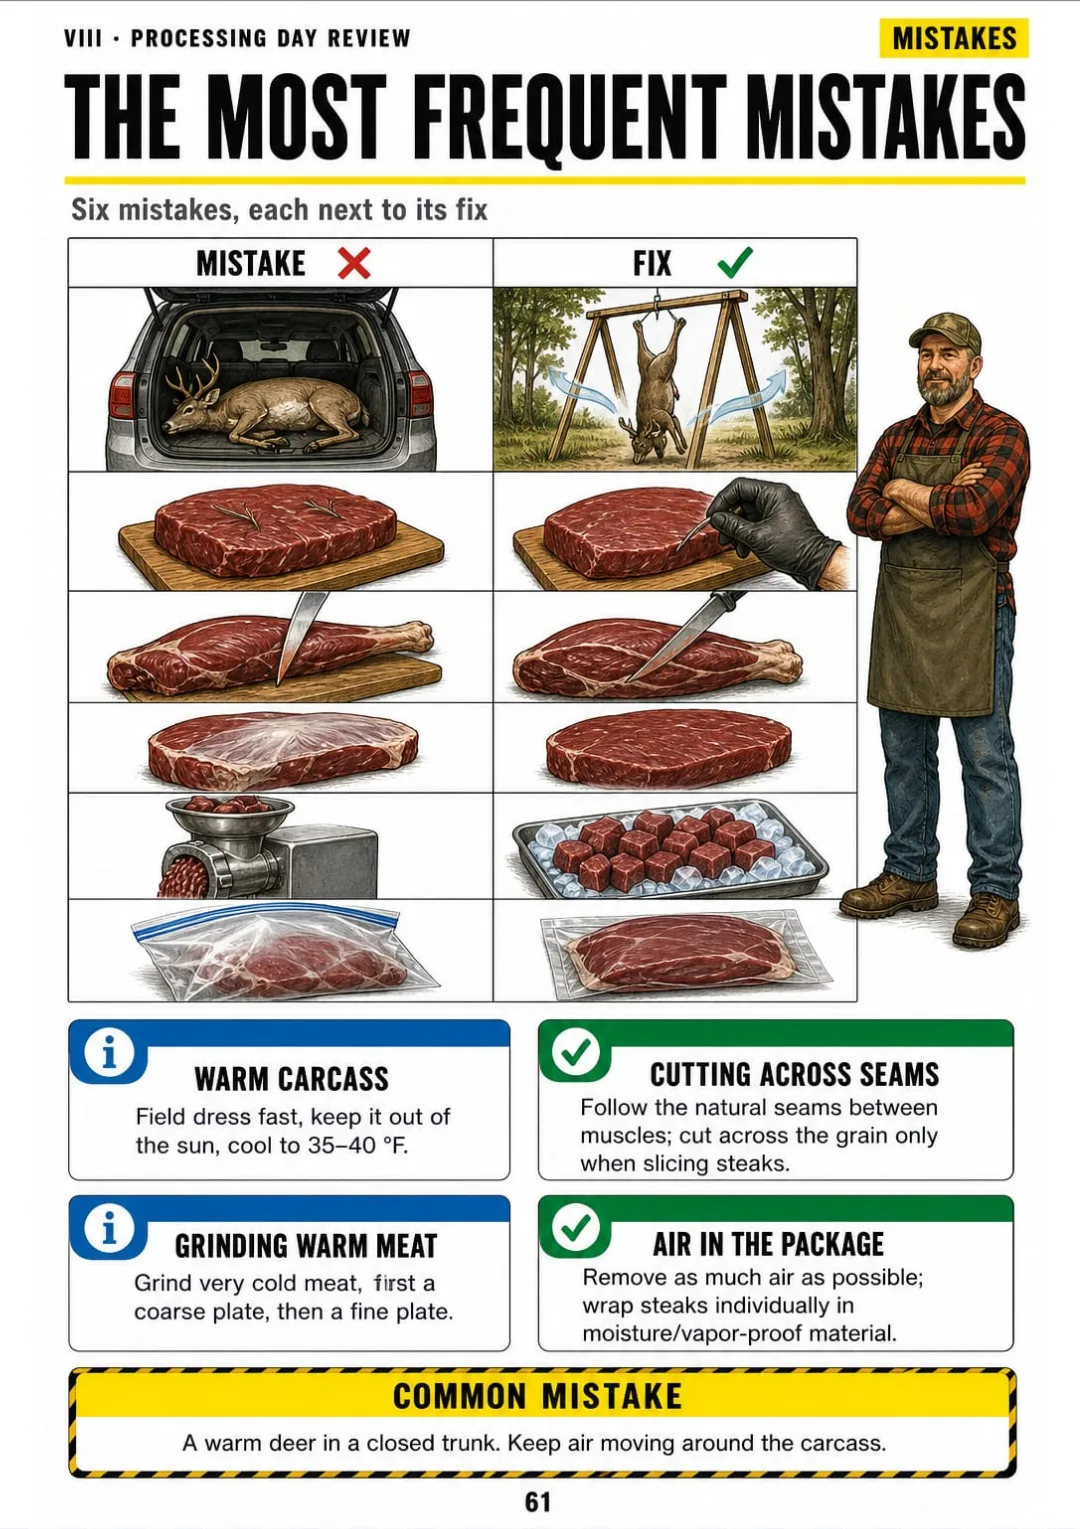
6 frequent mistakes side by side with the fix for each one

Swipe to see more →

These are real pages from the book. The table of contents is the full one: 8 parts and 60 topics.

The Problem Isn't You. It's How It Was Explained.

You're in the garage with the hindquarter on the table and a knife in your hand. You can't tell where one muscle ends and the next begins, so it all goes in the grind pile.

Every video cuts it a different way, and the written guides describe the carcass in paragraphs: posterior to the scapula, dorsal to the ribs. Words don't show you where your knife goes.

Seven regions of the deer, one color each: neck, shoulder, backstrap, tenderloin, ribs, flank, hindquarter.

In this book, the whole deer is one drawing: seven regions, one color each. Neck, shoulder, backstrap, tenderloin, ribs, flank and hindquarter. You see the map before you make a single cut.

Same thing for cooling the carcass, checking the weather when your garage isn't cold enough, the cooler method, skinning in order, finding the hindquarter seams and double wrapping: each one has its own page, with the temperatures in a box.

You look at the page, you know where you are on the deer, and you keep cutting. No going back to a video with your hands full.

COMPARE FOR YOURSELF

Same Topic, Two Ways to Learn It

THIS
  • The manual: line after line
  • Cooling and cutting explained only in words
  • You get to the cutting table with doubts
Following harvest, prompt reduction of carcass temperature is essential to inhibit bacterial proliferation and to preserve meat quality. Internal muscle temperature should be lowered to approximately 35–40 °F as rapidly as prevailing conditions permit. The body cavity should be propped open to facilitate air circulation, and the carcass should be positioned in a shaded, well-ventilated location, away from direct sunlight. Where ambient temperatures remain elevated, alternative cooling methods must be considered, as delayed cooling may result in spoilage and objectionable off-flavors.
FOR THIS
  • Carcass cooling in one drawing
  • The temperatures in a box
  • You see it and you get it
Cool the carcass to 35–40 °F fast, in the shade, with the cavity open
CONTENTS

Take a Look at the 8 Parts and 60 Topics

Before the knife, hanging and skinning, the deer muscle map, primal cuts, the hindquarter seam by seam, trim, cut and grind, wrap and freeze, and a processing day review: 64 pages, all illustrated.

IBefore the Knife · pp. 5-11
  1. The Same Order Every Time
  2. The Tools You Already Have
  3. Setting Up Your Garage Station
  4. Gloves, Clean Surfaces, Cold Meat
  5. The Temperatures on One Page
  6. Can It Hang Tonight? The Weather Check
  7. CWD Basics and Your State's Rules
IIHanging and Skinning · pp. 12-18
  1. Cool the Carcass Fast
  2. Head Up or Head Down: Hanging with a Gambrel
  3. Aging: How Many Days at What Temperature
  4. The Cooler Method When It's Too Warm
  5. Skinning in Order
  6. Keep Hair Off the Meat
  7. Trim the Wound Channel and Bloodshot Meat
IIIThe Deer Muscle Map · pp. 19-24
  1. The Whole Deer in One Drawing
  2. The Hindquarter Muscle Groups
  3. Backstrap vs. Tenderloin
  4. The Front Shoulder
  5. Neck, Ribs, Flank and Brisket
  6. Silverskin, Fat and Tendons: What Makes It Taste Gamey
IVPrimal Cuts · pp. 25-31
  1. Front Shoulders: No Joint to Cut
  2. Removing the Backstraps
  3. Removing the Tenderloins
  4. Hindquarter Off at the Ball Joint
  5. The Neck Roast
  6. Rib Meat and Flank
  7. Bone It Out: Don't Saw the Spine
VThe Hindquarter, Seam by Seam · pp. 32-40
  1. Find the Seams Before You Cut
  2. The Top Round
  3. The Bottom Round
  4. The Eye of Round
  5. The Sirloin Tip (Knuckle)
  6. The Sirloin
  7. The Shank
  8. Tendons and Silverskin on Each Muscle
  9. What Each Muscle Gives You
VITrim, Cut and Grind · pp. 41-49
  1. Cleaning a Muscle Before Cutting
  2. Cutting Across the Grain
  3. Backstrap Medallions
  4. Steaks from the Hindquarter
  5. Roasts: Size and Tying
  6. What Goes in the Grind Pile
  7. Adding Fat to Venison Burger
  8. Keep It Cold While You Grind
  9. Coarse Plate, Then Fine Plate
VIIWrap, Freeze and Log · pp. 50-56
  1. Double Wrap: Plastic, Then Freezer Paper
  2. Vacuum Sealing Without Mistakes
  3. Labeling Every Package
  4. Portion for How You Cook
  5. The Freezer at 0°F
  6. Thawing Safely
  7. What Did Your Deer Give You? Estimating Yield
VIIIProcessing Day Review · pp. 57-64
  1. Processing Day Checklist
  2. The Temperatures, Again
  3. Name That Muscle: Quick Check
  4. Keep It or Grind It?
  5. The Most Frequent Mistakes
  6. Why It Tasted Gamey (and How to Avoid It)
  7. The Meat Got Warm: What Now?
  8. Cleanup and Carcass Disposal

One Page, One Topic, All Clear

Think of it this way:

The deer has hung for a few days, the hindquarter is on the table, and you have to decide: steaks, a roast or the grind pile.

You open the page on finding the seams and it's drawn: push with your thumb, follow the membrane, cut only where it holds. Top round, bottom round, eye of round: each one comes off whole.

Push with your thumb, follow the membrane, cut only where it holds.

Same with the front shoulder, the backstraps, cleaning silverskin, adding fat to burger and double wrapping: each one on its own page.

Home Deer Processing Illustrated is 8 parts and 60 topics, all drawn, and it ends with a processing day checklist and the most frequent mistakes.

What you see drawn, you don't have to memorize.

What's Inside Home Deer Processing Illustrated:

Ipp. 5-11

Before the Knife

The order of work, the tools you already have, your garage station, clean surfaces, the temperatures on one page, the weather check and CWD basics.

IIpp. 12-18

Hanging and Skinning

Cooling the carcass fast, hanging with a gambrel, aging days and temperatures, the cooler method, skinning in order, keeping hair off and trimming bloodshot meat.

IIIpp. 19-24

The Deer Muscle Map

The whole deer in one drawing, the hindquarter muscle groups, backstrap vs. tenderloin, the shoulder, neck, ribs and flank, and what makes it taste gamey.

IVpp. 25-31

Primal Cuts

Front shoulders with no joint to cut, backstraps, tenderloins, the hindquarter off at the ball joint, the neck roast, rib meat and boning out without sawing the spine.

Vpp. 32-40

The Hindquarter, Seam by Seam

Finding the seams, top round, bottom round, eye of round, sirloin tip, sirloin, shank, tendons and silverskin, and what each muscle gives you.

VIpp. 41-49

Trim, Cut and Grind

Cleaning a muscle, cutting across the grain, backstrap medallions, steaks, roasts and tying, the grind pile, adding fat, keeping it cold and the two grinder plates.

VIIpp. 50-56

Wrap, Freeze and Log

Double wrapping, vacuum sealing, labeling, portioning, the freezer at 0°F, thawing safely and estimating what your deer gave you.

VIIIpp. 57-64

Processing Day Review

The processing day checklist, the temperatures again, name that muscle, keep it or grind it, the most frequent mistakes, warm meat and cleanup and carcass disposal.

At the end of the book: A processing day checklist, the temperatures on one page and a review of the most frequent mistakes.
Plus: 2 Free Books

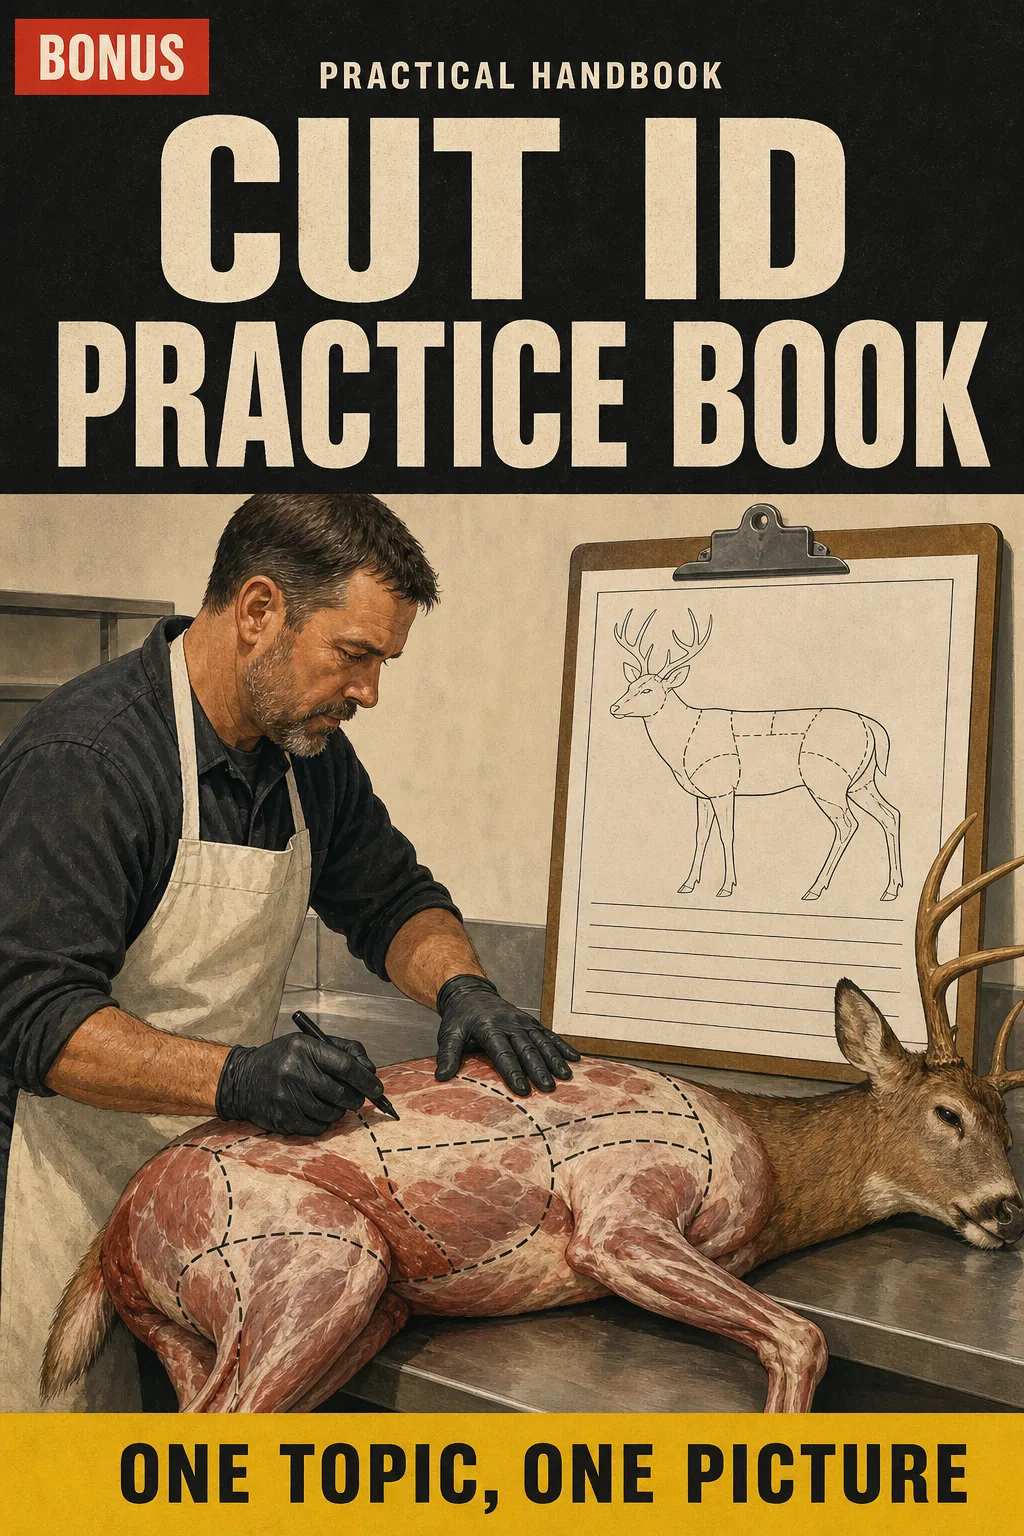
Cut ID Practice Book

BONUS 1: «Cut ID Practice Book»

Value on its own: US$ 17.90

Label the muscles and pick the right cut on blank deer diagrams, so you know where your knife goes before the deer is even hanging.

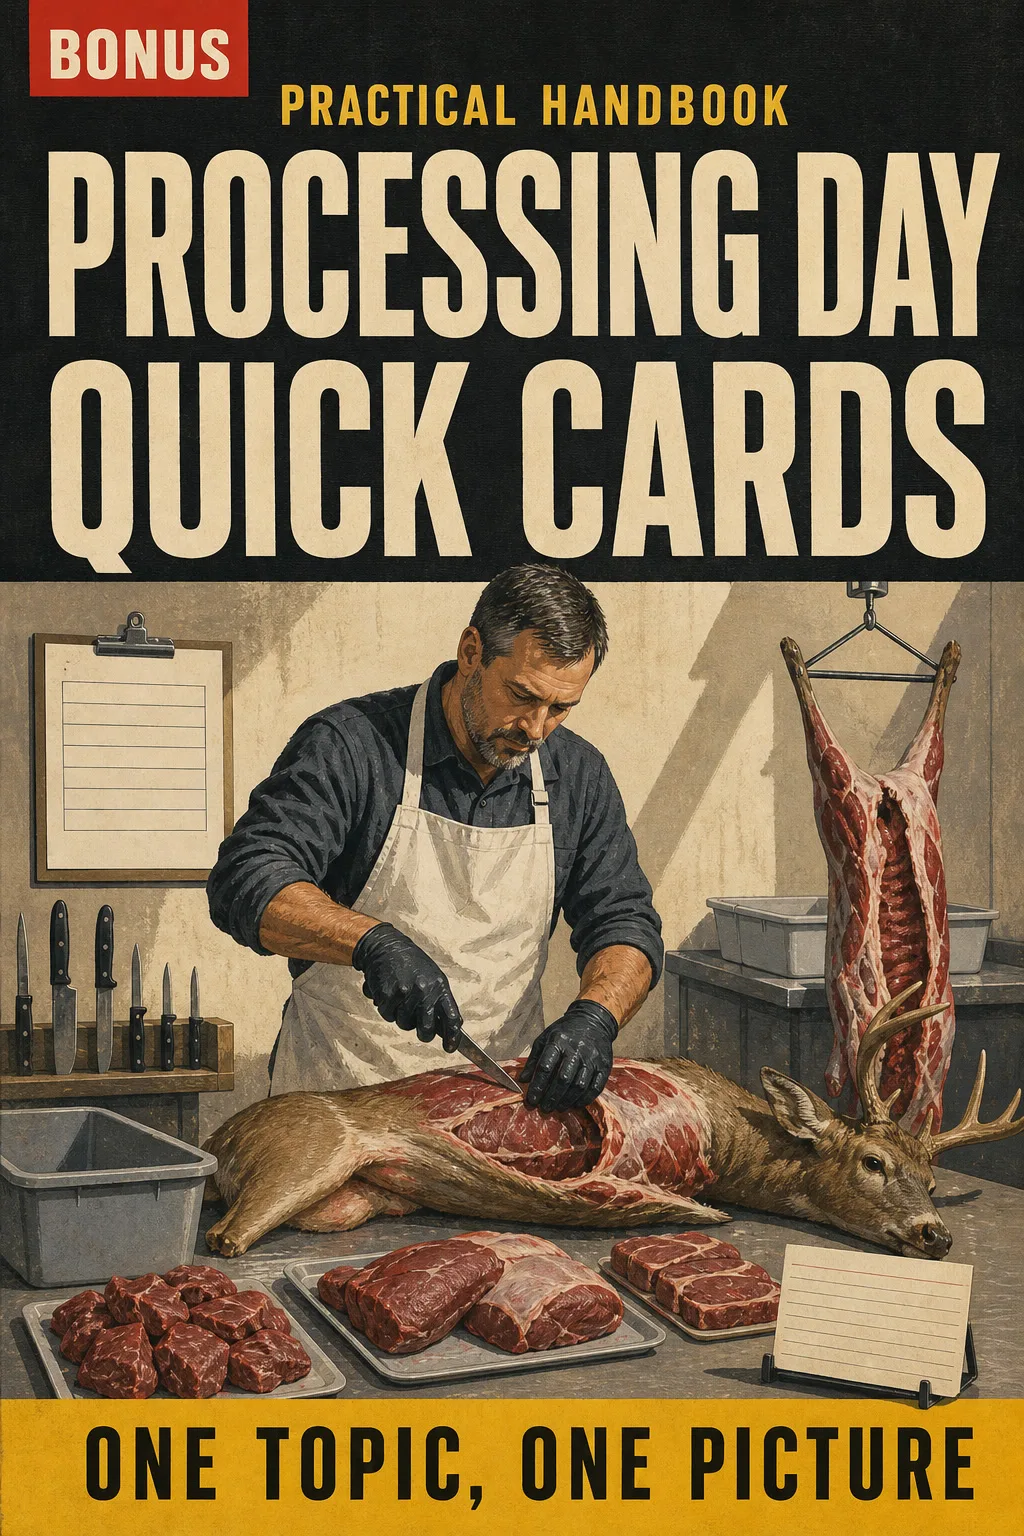
Processing Day Quick Cards

BONUS 2: «Processing Day Quick Cards»

Value on its own: US$ 14.90

Printable one-page cards with the order of work, the temperatures to check and the most common mistakes, ready to tape up in the garage.

Home Deer Processing Illustrated with 2 Free Books

  • Home Deer Processing Illustrated: 64 illustrated pagesUS$ 63
  • BONUS 1: Cut ID Practice BookUS$ 17.90
  • BONUS 2: Processing Day Quick CardsUS$ 14.90
  • High-resolution PDF to printIncluded
Total value US$ 95.80
YOUR PRICE:
US$ 27
You save US$ 68.80
YES, I WANT HOME DEER PROCESSING ILLUSTRATED FOR US$ 27

📄 This is a digital PDF book sent to your email: nothing is printed or shipped.

Secure purchaseEncrypted payment30-day guarantee

PDF by email: We email you Home Deer Processing Illustrated as a PDF, together with the two free books. It's a single payment: no installments, no extra charges.

Who This Book Is For

You've always used a processor

You've always used a processor

This season you do it yourself. The book gives you the order of work and every cut drawn, so you know where to start.

Your deer is hanging this week

Your deer is hanging this week

You have a few days. Print the pages, tape the Processing Day Quick Cards up in the garage and follow the same steps in the same order.

You've processed a deer before

You've processed a deer before

You can already skin and quarter. The seam-by-seam and cleaning pages help you get steaks and roasts instead of sending it all to the grind pile.

Everything You Get Today

US$ 95.80US$ 27
YES, I WANT HOME DEER PROCESSING ILLUSTRATED FOR US$ 27

📄 This is a digital PDF book sent to your email: nothing is printed or shipped.

30DAYS
GUARANTEE

30-Day Guarantee

Try Home Deer Processing Illustrated for 30 days, bonus books included.

We refund everything if the file won't open, if the book isn't what you see here, if you were charged twice or if the email doesn't arrive. Just email us.

You pay once. No subscriptions.

Frequently Asked Questions

Is it for me if I've always taken my deer to a processor?

Yes. It starts from the order of work and the tools you already have: sharp knives, a cutting surface, a gambrel and a cooler. No bone saw needed: you bone out without cutting through the spine, and a grinder only matters for the grind pile. Every step is drawn, and it doesn't assume you're a butcher.

Where does the content come from?

Temperatures and safe handling are checked against USDA Food Safety and Inspection Service guidelines. For CWD, carcass transport and disposal, the book tells you to check your state wildlife agency's rules.

Is it official material?

No. It's an independent illustrated book. It isn't published or endorsed by any government agency.

Does it replace a hands-on class or my state's rules?

No. It's educational material. It doesn't replace hands-on training, your state wildlife agency's rules or food safety authorities' guidance. Always check your state's CWD testing rules before eating the meat.

Why a book if there are free videos?

Every video cuts it a different way, and you can't pause one with bloody hands. Here the same order is always on the page: print it, tape it up in the garage, look and keep cutting. The blank deer diagrams in Cut ID Practice Book let you practice the cuts before processing day.

When and how do I get it?

The book and the 2 bonus books arrive as PDFs by email, at the address you enter at checkout.

Do I have to pay every month?

No. It's a one-time payment.

Can I have it on paper?

Yes. The PDF is printable: print the pages you need and keep them on the workbench in the garage.

How does the refund work?

You have 30 days. We refund everything if the file won't open, if the book isn't what you see on this page, if you were charged twice or if the email doesn't arrive: just email us.

Before You Close This Page

No more rewatching videos that each cut it differently.

The hindquarter seams, drawn so you can see them.

You get to the cutting table knowing where every cut is.

Drawings make studying faster.

The book is right below.

One-time payment: US$ 27 · Guarantee: 30 days · PDF by email

YES, I WANT HOME DEER PROCESSING ILLUSTRATED FOR US$ 27

📄 This is a digital PDF book sent to your email: nothing is printed or shipped.